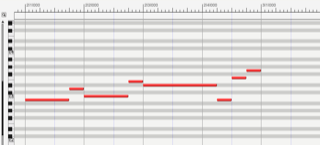
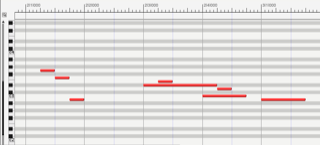
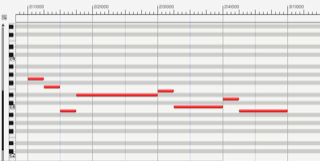
Region menu
For a general explanation of how to use Region menu operations, see Editing Basics. Region menu commands can be applied to MIDI data, audio data or both.
Region command windows
All of the Region menu commands open as a window that can stay open, unlike Edit menu commands, which are dialog boxes that must be okayed or cancelled before you can do anything else. By staying open, Region menu commands let you apply their effect without revisiting the menu each time. For example, if you are quantizing a number of tracks, you can leave the Quantize window open while you successively select different tracks and apply different quantize settings to them.
Region command options
The Region Commands preferences, found in the Preferences and Settings window, lets you choose one of the following three options:
- Apply closes window: Makes the window close when you click the Apply button or press Enter.
- Apply sends window to back: Causes the window to go to the back when you click the Apply button or press the Enter key.
- Apply with Enter key sends window to back: Causes the window to stay in front when you click the Apply button and go to the back when you press the Enter key.
Additionally, the mini-menu in each Region command window provides these commands:
Preview Stays On When Window Not In Front: For Region commands with previewing, such as the Quantize commands, this option, when checked, causes previewing to continue (before actually applying the effect) even when the window is not the front-most window.
Save settings: Lets you name and save the settings currently displayed in the Region commands window as a preset file on disk. These settings then appear by name at the bottom of the mini-menu for that same Region command (Quantize, Transpose, etc.) If the Region command has a matching real-time MIDI plug-in, saved settings also appear in the Effect window mini-menu as presets for the corresponding real-time MIDI plug-in.
Show Presets In Finder/Explorer: Opens the folder in the Mac OS Finder or Windows Explorer where the user preset files are stored, if any. You can then rename them or delete them.
Previewing
Some Region menu commands have a preview check box to the left of the Apply button. The preview check box provide real-time previewing, which allows you to hear the results of the Region operation in real time, as the sequence plays, before you actually apply it permanently with the Apply button. Data remains unaffected until you click the Apply button.
Transpose
Digital Performer's Transpose command transposes the pitches of all MIDI notes in a selected region. It can also transpose the pitch of audio data with either formant-corrected pitch-shifting or conventional pitch-shifting, using Digital Performer's non-destructive pitch automation or by producing new audio files.
The Transpose command can transpose both audio and MIDI notes in many ways:
- transpose by interval
- transpose diatonically
- change key from any root to any other
- change key from any mode to any other
- map each pitch to any other pitch
- transpose using scale sizes larger or smaller than 12 notes
- transpose up or down, by any number of octaves
- create and save custom transpose maps
- create and save custom scales or keys
- create harmonies
The Transpose window provides several ways of transposing, options for each type, a Transpose Map that shows you how each pitch will be changed, and a Custom Maps list which can save transposition maps.
The Transpose window allows you to either transpose or harmonize MIDI data. The Harmonize option copies the original MIDI notes, transposes the copied notes, and then merges them together with the original notes. This allows you to build harmonies quickly. You can also choose to include various types of controller date in the transposition, if desired.
For audio data, you can transpose using Digital Performer's real-time pitch automation (which does the transposition "on the fly" during playback and requires more computer processing power), or you can transpose by "constructively" creating new audio files (which takes less CPU power but only supports interval transposition).
Quantize
Quantizing changes the attack and release times of MIDI note events and audio soundbites to make them more rhythmically precise. Attacks and releases are aligned with a grid, a set of locations that occur on the beat and its subdivisions. Quantize is useful in correcting perceived rhythmic inaccuracies after your sequence is recorded. It does a rhythmic "cleaning up" based upon your specifications.
What to quantize: The What to quantize menu gives you the following choices for what you can quantize:
- Notes
- Soundbites
- Notes and soundbites
- Beats within soundbites
- Beats within soundbites and notes
- Controllers
- Custom
The Custom option gives you complete control over what you wish to quantize, including markers, patch changes, and tempo events in the conductor track. You can quantize anything except loops.
Groove Quantize
Digital Performer's Groove Quantize feature is easy to use and — from a creative standpoint — one of Digital Performer's most enjoyable features.
In musical terms, a groove is a unique rhythmic feel. Many artists are famous for a certain feel—or groove—in their music that makes their sound unique.
Digital Performer's Groove Quantize feature gives you complete reign over this important aspect of your music.
The effect of adding a groove to an otherwise mundane track can be stunning: the music instantly feels like it has a third dimension, and the sensation can be similar to that moment when you put on 3-D glasses in an old 3-D movie. Sometimes, the effect is subtle. Often, however, you'll find that a groove completely transforms music, making it sound totally different from its original form.
The elements of a groove
To master grooves, it is important to recognize the musical elements of a groove. A groove is generated by variations in the timing, accent, and duration of the notes being played. This is true for either MIDI data or audio data. In Digital Performer, a groove consists of a combination of the following elements:
- A quantize grid that affects the timing of notes (attacks only)
- A note-on velocity map
- A note duration map
- A meter
- A length (in measures)
- An overall beat subdivision
For example, a swing groove is usually based on a swung 8th note beat subdivision. If it's a hard swing, the eighth-note offbeats may be played quite late. The durations of the notes in such a groove tend to be longer, and the velocities emphasize the offbeats. The length of the groove is usually two bars, and it is often in 4/4 time.
When you apply a groove to some MIDI data in a track, the selected notes are modified according to these groove parameters.
Create Groove
The Create Groove command lets you create your own Grooves from MIDI note data or audio data (loops, audio tracks — any rhythmic audio) in any track. The source material can come from any Digital Performer file, any standard MIDI file or any audio file. Grooves can be any length.
Smart Quantize
Smart Quantize is especially designed for quantizing MIDI note data that will be transferred to music notation software. Digital Performer's built-in QuickScribe Editor, however, does not require quantization of any kind; it will notate original, unquantized MIDI data.
Smart Quantize is great for quantizing large sections of music when you don't want to have to decide what the quantize grid value should be. For example, if a sixteenth note grid wouldn't be appropriate for the music, nor would any other particular quantize value, try Smart Quantize. It uses a floating grid depending on the music, and it even recognizes tuplets.
Humanize
The Humanize command lets you add a "random" element—or "humanized" feel—to your music. With this command, you can randomize any combination of the following elements of your music:
- Note placement
- Soundbite placement
- Note durations
- Velocities
- Pitches
- Tempo
In addition, you can create a unique blend of these humanize elements and save it as a humanize style, which you can recall and use at any time. You can use the Humanize command to create arpeggiation effects, hi-hat (or other percussion instrument) grooves, and other dramatic musical effects.
DeFlam
The DeFlam command looks for groups of MIDI notes that are very close together. When such a group is found, the average attack time of the group of notes is computed. All notes in the group are moved such that their attack times are aligned exactly to the average time.
The group of notes that is deflammed is determined by the tick value you specify. This creates a "window" of effectiveness. Groups of notes within that window will be deflammed.
Change Velocity
Change Velocity is a powerful command that lets you modify the velocities of all MIDI notes in a region on a scale from 0-127. You can remove irregularities, make passages louder or softer and create crescendos, diminuendos and other similar effects. Note that not all MIDI keyboards and sound modules respond to velocity data, and those that do may need to be set up to respond correctly to this information. Consult your owner's manuals for details. The Change Velocity window provides a menu with numerous options. Change Velocity has no effect on audio.
Change Duration
The Change Duration command modifies the duration of all MIDI notes in the selected region without changing the placement of attack times. This means that the amount of time a note is "on" or sounding can be changed without affecting its actual rhythmic placement in relation to other notes and events. The Change Duration command is useful for changing the articulation or space between notes. You can make note events sound connected or separate in relation to each other, for example. It also provides some useful utility functions.
Split Notes
The Split Notes command lets you selectively cut or copy notes in the selected region. The selection is based upon pitch, velocity and/or duration. This means that only notes with specific pitches, ranges, durations and velocities from the selected region are cut or copied. For example, all notes between A3 and C#3 with velocities greater than 100 and with durations above a half note can be extracted from a region. Here are some additional things you can do with Split Notes:
- Use an on-screen graphic keyboard to specify the pitches of notes you wish to split. This keyboard allows you to pick a non-contiguous range of pitches for splitting.
- Automatically Paste or Merge the split notes to a pre-existing track.
- Automatically create a new track and Paste the split notes to it.
- Automatically create a set of new tracks and paste the split notes to each track according to pitch.
Invert Pitch
The Invert Pitch command inverts or flips MIDI notes around a specified axis. The inversion is chromatic, that is, exact.
Apply MIDI Plug-in
The MIDI Effects Plug-ins hierarchical menu supplies "special effects" processing to your MIDI tracks. These are plug-ins written by MOTU and other third-party developers that can be applied to your MIDI tracks in the same fashion as Digital Performer's standard Region menu operations. For further details, see the MIDI Plug-ins.
The continuous data commands
Continuous data is audio mix automation data or MIDI data which changes smoothly over time. Audio continuous data types include volume and pan mix automation, plug-in parameter automation, etc. Continuous MIDI data types include pitch bend, mono and poly key pressure and controller information. These types of data are output rather quickly, resulting in a large amount of data. Continuous data events are closely spaced, each specifying a slightly different value for the parameter which is changing. For instance, when you move a pitch wheel, a different pitch bend value might be sent every 20 ticks, resulting in 120 continuous data events per quarter note.
MIDI continuous data is not really continuous at all: it is approximated by large numbers of events, each of which contain a small value change. When played back, they create a change that seems smooth and continuous. The closer together in time successive values are, the smoother the change will be. If the values are too close together, delays can occur due to the baud rate (data transfer speed) limit of MIDI transmission.
There are 16,384 different pitch bend values and 128 different controller and aftertouch values. Some synthesizers do not respond to every different pitch bend value: several successive values may produce the same effect. The response to different controller values may also be hard to hear. These facts may influence your decision about how many continuous data events to store. Digital Performer gives you the option to decrease or increase the number of continuous data events in a region.
Thin Continuous Data
Synthesizers tend to send continuous data as fast as they possibly can. If you record several tracks of this and play them all back at once, Digital Performer, your synthesizers, or MIDI itself may bog down. The Thin Continuous Data command selectively removes continuous data events, "thinning out" the amount of continuous data while retaining all of its essential characteristics. This allows you to transmit a reasonable amount of continuous data that can be handled easily by all components of your MIDI system.
Create Continuous Data
The Create Continuous Data command creates a stream of continuous data events that change smoothly over time. You can use it to create pitch bends, crescendos and diminuendos, filter sweeps and many other effects.
This command creates continuous data events that change smoothly between the starting and ending values. All values must be within the range zero to 127, except for pitch bend data which is in the range -8192 to +8191. Data created by the Create Continuous Data command will replace existing controller data of the same type.
Change Continuous Data
With the Change Continuous Data command, you can modify existing continuous data by scaling it or limiting it to a specific range.
Reassign Continuous Data
With the Reassign Continuous Data command you can convert one type of continuous data into another. For example, you can convert pitch bend data into modulation wheel data. This command is very useful for changing the controller number of continuous data when playing back a sequence on a different synthesizer than the one it was recorded with.
Reverse Time
Reverse Time reverses the order of notes' attack times in a region. A note whose attack occurs two beats from the beginning of the region is moved so that its attack occurs two beats before the end of the region. In doing so, Digital Performer either maintains the note's duration or ends the duration just before the next attack. Notice in the example below where Reverse Time was applied to a selection from 2|1|000 to 3|1|000 that Reverse Time places the attack of the first note exactly at the end of the region, extending the duration into the next bar.
Original:

Reverse Time:

Retrograde
Retrograde inversion simply reverses the order of notes within the region: the first note becomes the last note, the last note becomes the first note, and so on. This is analogous to playing a tape backwards and recording the result.
To get an exact reversal of the notes, you must select a region of time rather than specific events. In addition, the region of time must include the duration of the last note in the region. In the example below, the last note is the sixteenth note, G4. To obtain the results shown on the bottom, you would have to select the region from 2|1|000 to 3|1|000, where 3|1|000 takes into account the duration of the G4 sixteenth note.
To specify a region of time that includes the final duration, select the region using the Selection Bar in the Tracks window, or by dragging in the Time Ruler of the MIDI Editor or Track Overview. Selecting specific events won't work because the duration of the final note is not included (for example, if you selected the original phrase above in the Event List, the end of the region would be 1|4|361 instead of 2|1|000).
When using the Retrograde command, you must select a time range. The Retrograde command will have no effect on event selections.
Original:

Retrograde:

Scale Time
The Scale Time command expands or compresses the duration of MIDI and audio events in the selected region by the length, end time, percentage or ratio (e.g. 2:3) that you specify. This effectively changes the distance between MIDI notes and soundbites, making them closer together or farther apart. Since the actual duration of events changes, the region will become smaller or larger after this command is invoked. If you check the Time-scale audio check box, then the actual waveform data inside soundbites is "constructively" time-stretched, too.
Scale Tempos
The scale tempo command provides several ways to modify existing tempos within a selected region in the Conductor track of a sequence or song. It modifies existing tempo events within the region, but it does not generate new tempo events. (To do so, use Project menu>Modify Conductor Track>Change Tempo.) The Scale Tempo command is ideal for making global changes to an existing tempo map that you have already created with the Change Tempo command. For example, you might have created an elaborate tempo map with many tempo nuances, and you would like to increase the overall tempo while maintaining the nuances.
Insert Loop
Inserts a track loop over the selected region.
Clear Loops
Removes any track looks within the current selection.
Set Sequence Tempo from MIDI
The Set Sequence Tempo from MIDI command analyzes the selected MIDI data and determines its tempo. This is helpful for determining the tempo of a performance with rubato sections, or one that was recorded without a click. If you are using the Conductor Track as your Tempo Control, the extracted tempo data is copied to the Conductor Track. If you are using the tempo slider as your Tempo Control, you have the option of setting the slider to the average tempo of the analyzed MIDI, or switching to Conductor mode.
If you select a region of MIDI that's too small for Digital Performer to properly analyze the tempo, a message will appear to let you know; in this case, try selected a larger region of MIDI data.
Capture real-time MIDI effects
The Capture Real Time MIDI Effects command lets you "print" any real-time MIDI effects processing that is currently applied to the track via the effects inserts in the Mixing Board window. Digital Performer cuts the original data from the track, runs it through the processing currently applied to the track, and then writes the data back to the track in its processed form.
While real-time effects operate on the entire track as it plays, this command allows you to apply effects to certain portions of a track.
This command is also useful when you want to tweak a real-time effect in ways that are not possible with the effect's controls. For example, you might have an arpeggiator effect applied to a track, and you might want to tweak individual note velocities of the notes it is generating. The Capture Real Time MIDI Effects command writes all of the notes permanently to the track so that you can edit them in the usual fashion.
Take automation snapshot
An automation snapshot is the process of inserting automation data for multiple mix parameters in one step at a particular location — or over a specified time range. For example, you might want to set initial values at the very beginning the project (e.g. bar 1) for all mix parameters you'll be automating. Or, you might like to reset all values for an entire section of a mix, regardless of the automation data currently there. Digital Performer lets you take a snapshot at a particular point in time or apply it to any time range of your choice. You also have complete control over which parameters to include in a snapshot. Snapshot automation can be applied from the Mixing Board, Sequence Editor, Effects window or other windows. Different default settings can be stored for taking snapshots from these different windows.
For complete details, refer to the Digital Performer User guide.
Set Gap Between Soundbites
The Set Gap Between Soundbites command sets the gap between each selected soundbite, and the previous soundbite, based on the time value specified in the dialog. Each soundbite that is not selected is offset by the same amount, thus preserving the gaps in any non-selected bites. In other words, this command is essentially a "ripple edit" where the start time of soundbites later in the track is effected by changes to soundbites that precede them.
This command has no effect on the very first soundbite in the track. This lets you Select All and set a gap of two seconds without a gap appearing at the beginning. Soundbites that overlap other soundbites — or that have a crossfade with another soundbite — are not treated as individual soundbites, and so no gap will be inserted between them. This is particularly useful when preparing a sequence to be burned to CD.
Insert Mute Automation
The Insert Mute Automation command lets you insert mute automation data over a selected time range in any MIDI or audio track.
Clear mute automation
The Clear Mute Automation command lets you remove mute automation data in any MIDI or audio track.
Audition Selection
lets you audition a selection of MIDI and/or audio data.